@Cricut has teamed up with @thebirthdaypartyproject and challenged crafters to make 50,000
projects to help celebrate kids in need.
projects to help celebrate kids in need.
I am very inspired by @pigskinsandpigtails and all her creative projects. I too fell in love with Cricut
vinyl screen printing. I created this birthday gift bag. I thought it was a special way for a child to
receive a gift. The little pocket is perfect for money, gift cards or just a place to hold little treasures.
I created the SVG that is available in my Etsy store. Link above. I thought vinyl screen printing was an
easy way to make multiple bags very quickly. I will be sending my bags off in the mail tomorrow.
Here is how I did it.
Download the SVG from my store. Using your Cricut and a fine-point blade, cut a piece of Permanent Premium Vinyl. It is very important to MIRROR image when cutting vinyl for silk screening!
Weed your image. Remember you need to remove the vinyl where you would like color to be. I wanted the words to be in yellow ink, so I removed them.
Apply transfer tape and adhere it to the back of your screen. Flip your screen over and rub it down.
Carefully remove the transfer tape. The words should read backwards.
With the words reading backwards, tape the entire screen around the vinyl. The ink will go through anywhere the screen that is not covered. So, tape everything you do not want ink to go through.
Position your felt under the screen. Make sure it is lines up correctly. Tape down so it does not move.
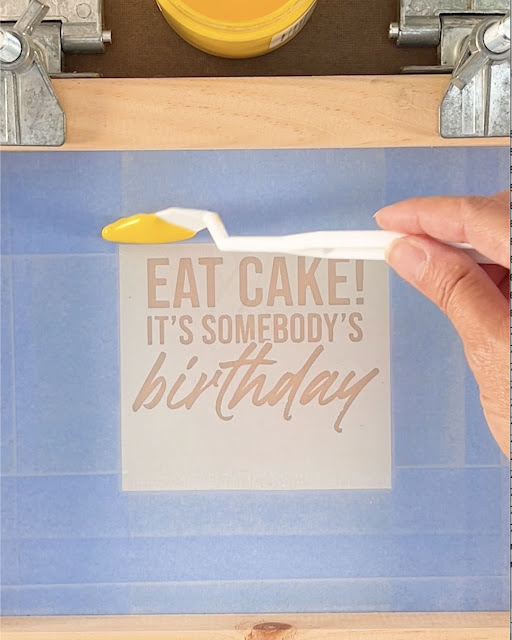
Apply ink to your screen. I love Speedball fabric ink for this project. It is permanent and soft when dried.
Use a squeegee and pull the ink through the screen. You may need to do it a couple of times the first time to get a nice print.
That is how screen printing with vinyl is done. It takes some practice but the benefits of screen printing is that you can make multiple prints very quickly. You only need to cut and weed one piece of vinyl. It is also cheaper than HTV vinyl. ]
I also screen printed the sprinkles. Once everything is dry, I assembled the cup cake. I used a 7 inch zipper.
Add a line of fabric glue to the zipper as wide as the cup cake bottom. Do not glue onto the zipper's teeth. Press firmly so the glue soaks into the felt.
Now add a line of glue as wide as the cup cake top to the zipper. Do not glue the felt onto the zipper's teeth. Press firmly so the glue soaks into the felt.
Grab your tote and put a piece of paper or newspaper inside the tote to protect it from glue that may soak through.
Flip cupcake over to the back and begin adding a line of glue around the entire edge of the cupcake. Do not glue over the zipper's teeth. Add a few dots of glue at the end of the zipper.
Flip the cup cake over and stick it to the tote. Press firmly until the glue siaks into the felt and canvas. Let for at least an hour before using. It is washable after 24 hours.
Want to get involved? Just make a project (or multiple). Then, mail your completed projects to:
The Birthday Party Project
ATTN: Cricut Projects
2143 Farrington Street
Dallas, TX 75207


